> ## Documentation Index
> Fetch the complete documentation index at: https://support.xraysim.com/llms.txt
> Use this file to discover all available pages before exploring further.
# Getting Started with the Desktop X-ray Simulator
> Learn how to install and launch the Desktop X-ray Simulator, open up your first case, and get familiar with the core controls and workflow.
### Installation and Login
[Click here to check the hardware requirements for running the Desktop X-ray Simulator.](/Tech/minimum-requirements-for-running-the-desktop-xray-simulator)
Download the appropriate platform installer from [the download page.](/Download/download)
Run the installation file (or drag the .dmg file if on Mac OS).
NOTICE for IT admins: The Desktop X-Ray Simulator support multi-user PC/workstation installation using MDM systems, like InTune. See the [MDM setup guide](/Tech/mdm-deployment-instructions) for details on running silent installs using command line arguments.
Locate the application on your computer and open it. You will be prompted to log in with your X-ray Simulator account. If you do not have account credentials, reach out to your institution's X-ray Simulator coordinator or review [Accounts and Login](/Guides/Introduction/accounts-and-login).
### Navigation and Controls
Open the Desktop X-ray Simulator application and enter your X-ray Simulator account username and password on the login screen. Click **Login** to proceed. See [Accounts and Login](/Guides/Introduction/accounts-and-login) if you need to confirm whether you should use an individual student account or a shared station account.
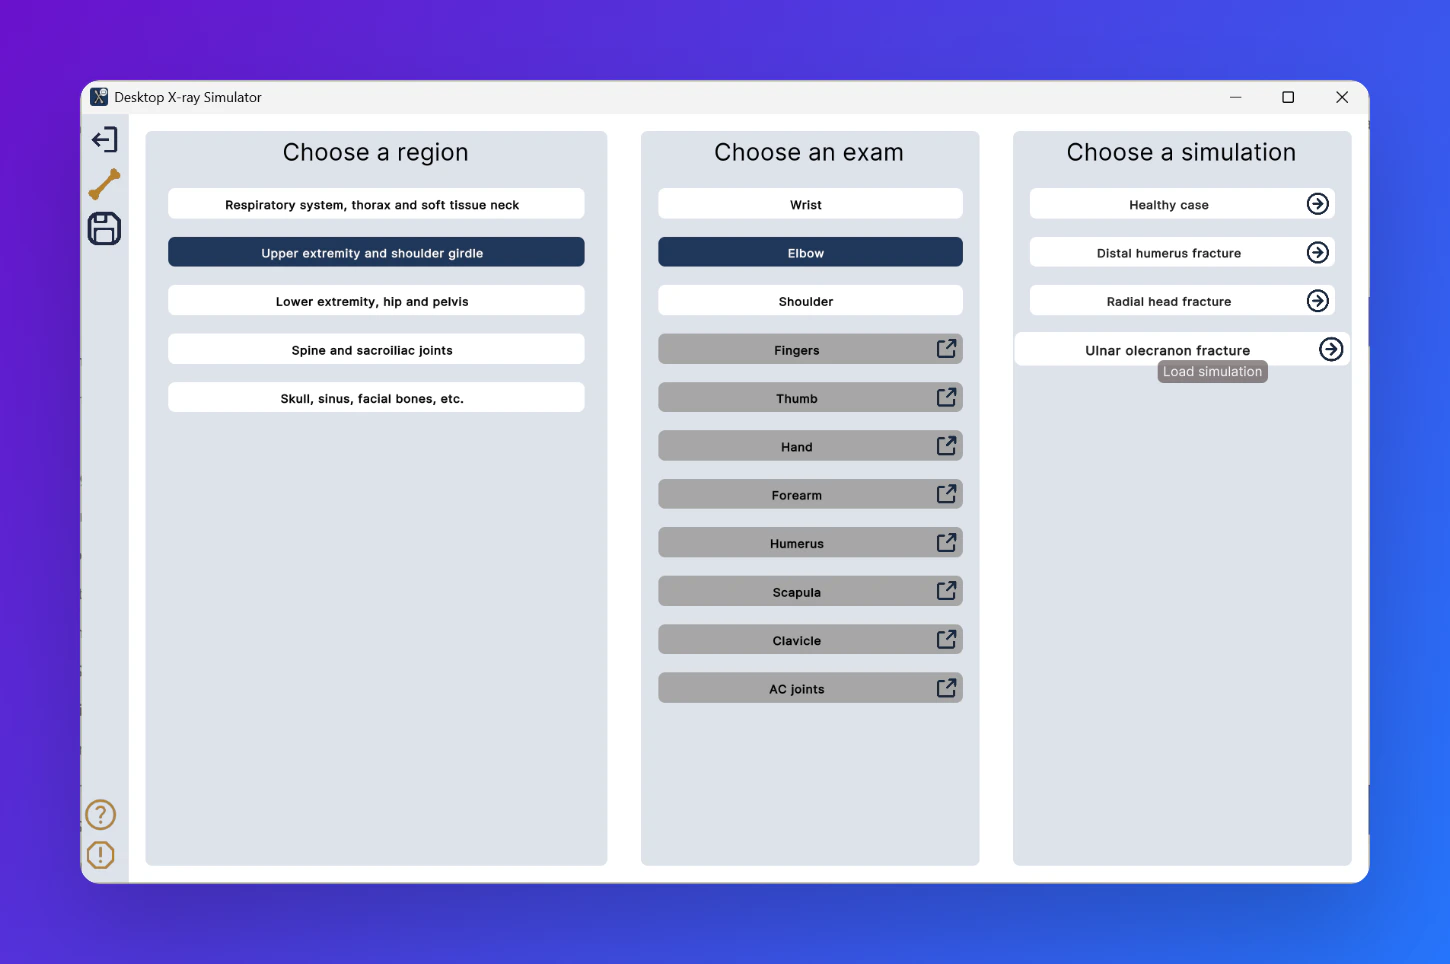
 After logging in, you are taken to the case selection screen. Start by choosing a body region in the left column - for example, *Upper extremity and shoulder girdle*. The middle column updates to show available exams for that region; select one to populate the right column with simulation cases. Click the arrow next to a case to load it.
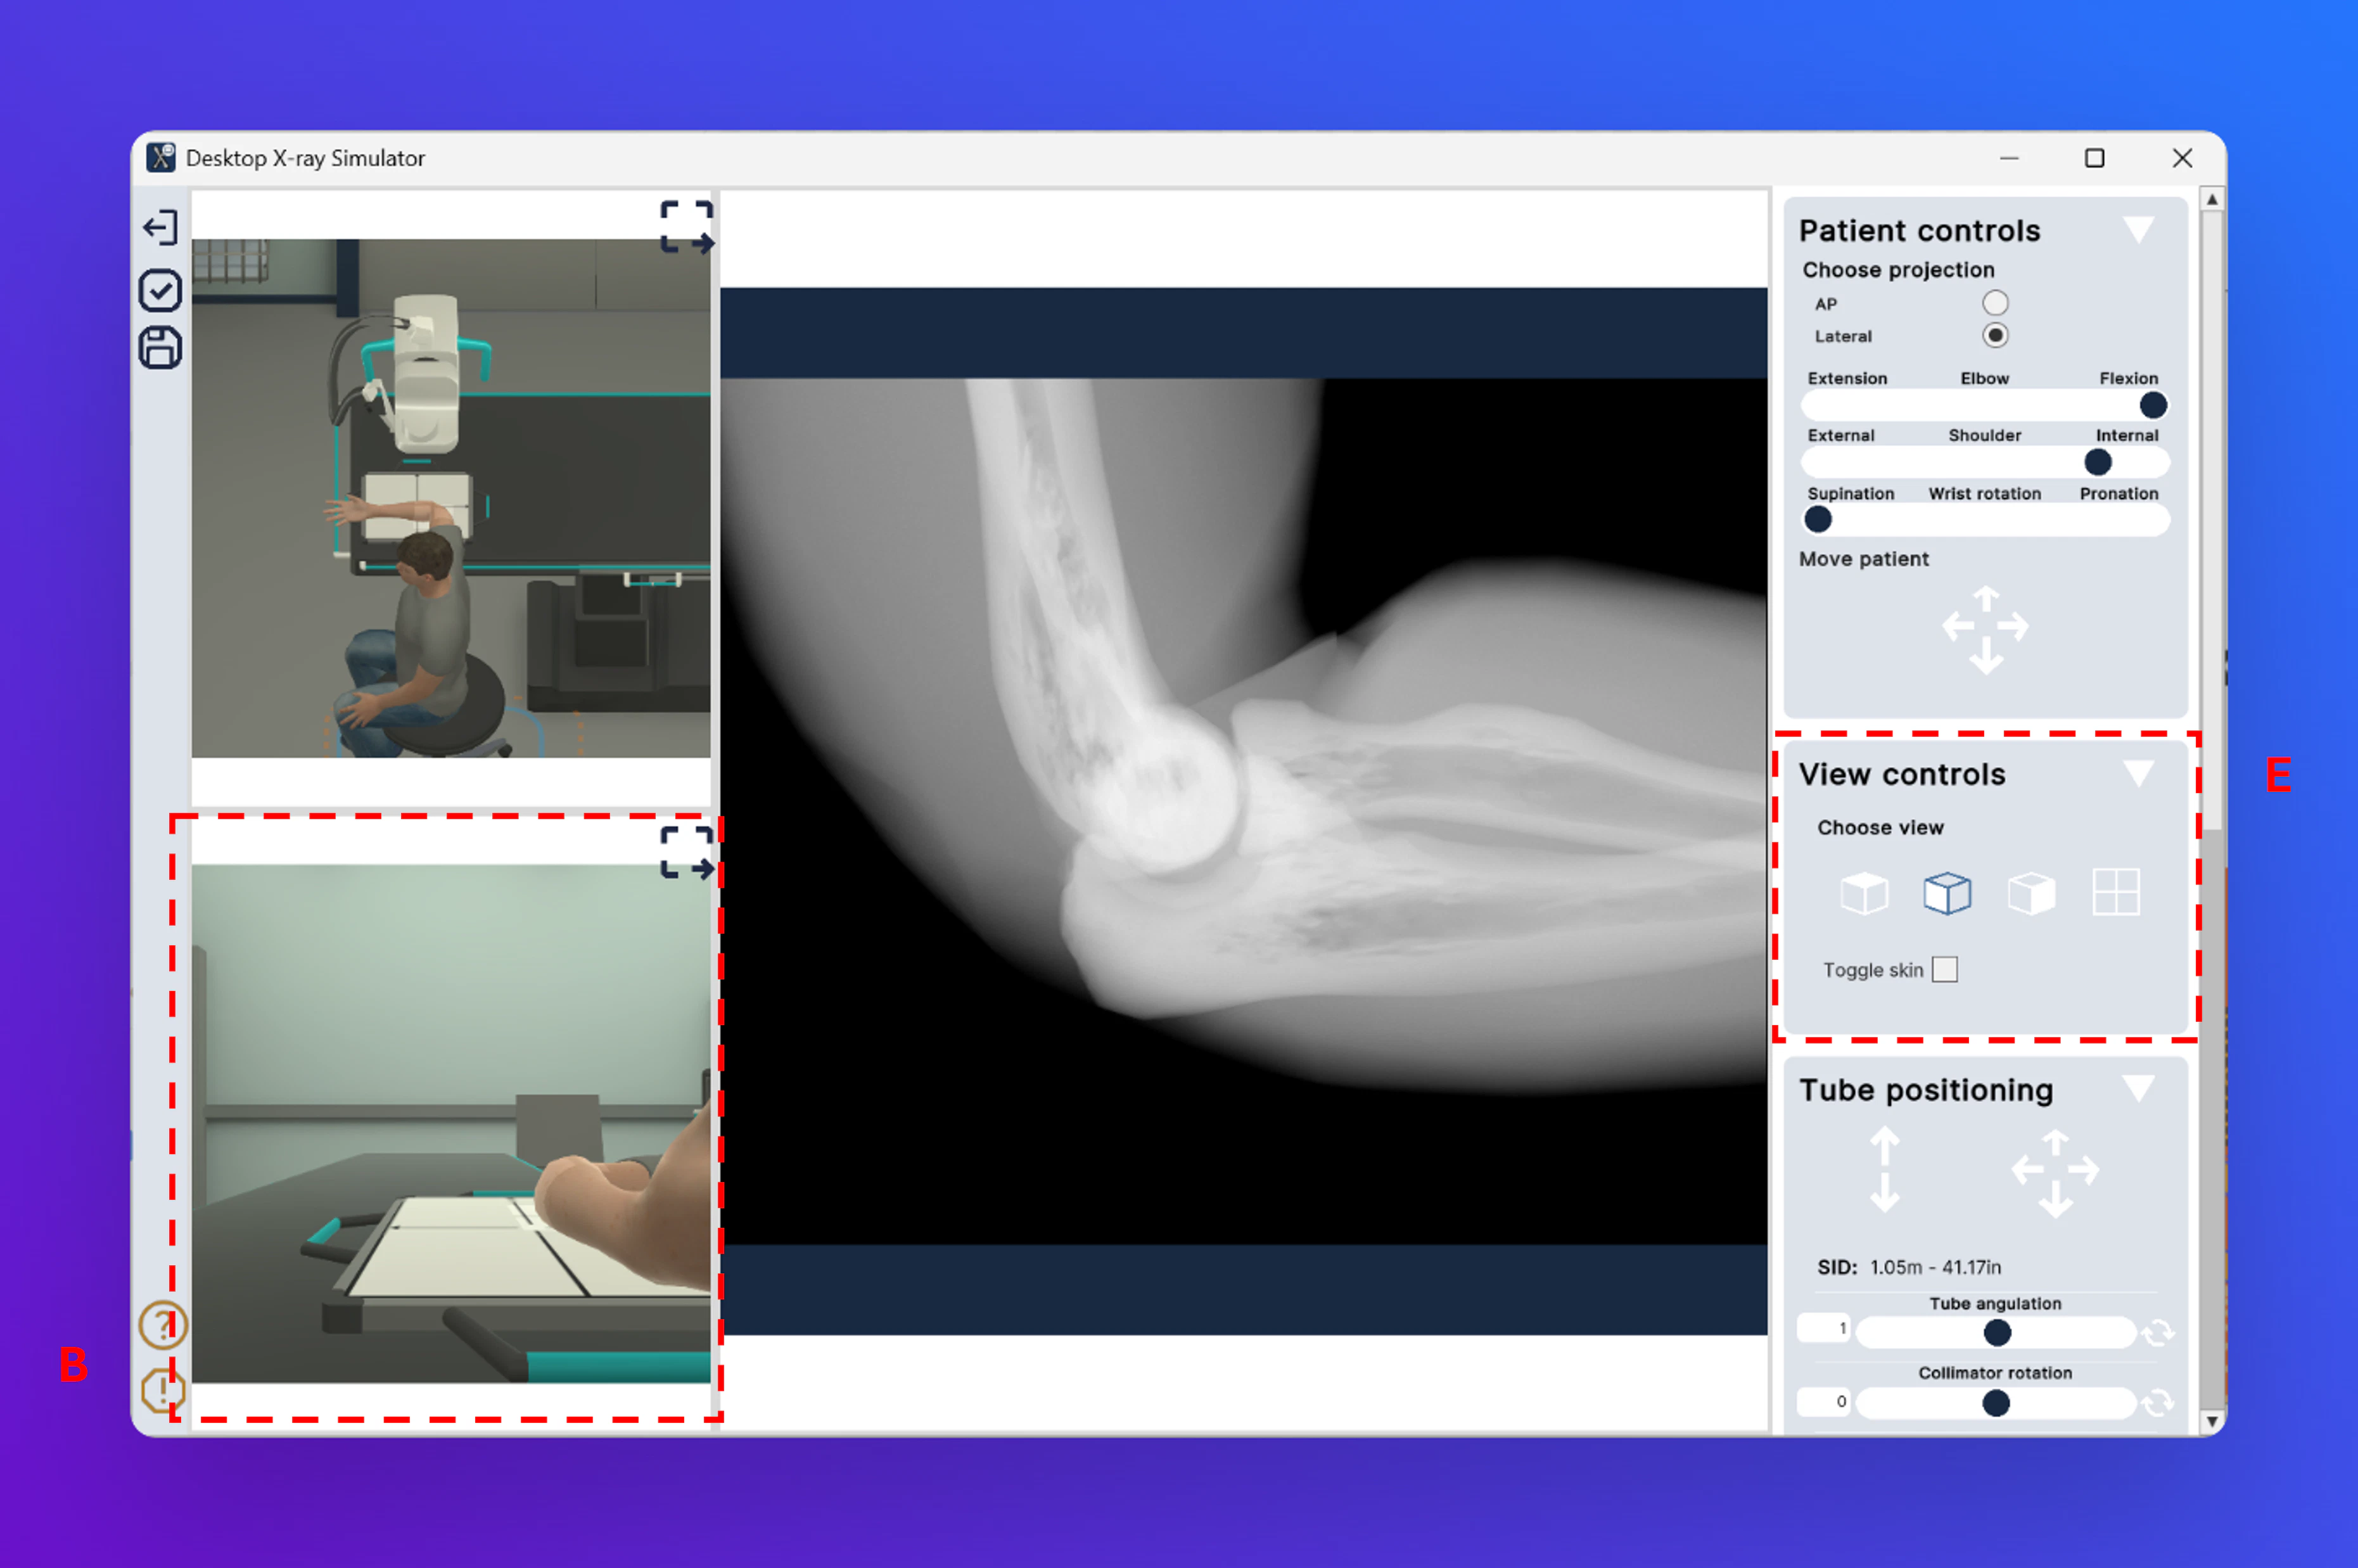
 Once a case loads, the workspace is divided into three panels. **A** is the overhead 3D view of the room, showing the patient, table, and X-ray tube at a glance. **B** is the secondary viewport, displaying a closer angle of the scene - useful for assessing patient and tube positioning in relation to each other. **C** is the X-ray output panel, which displays the most recent exposure and updates in real time as you adjust parameters.
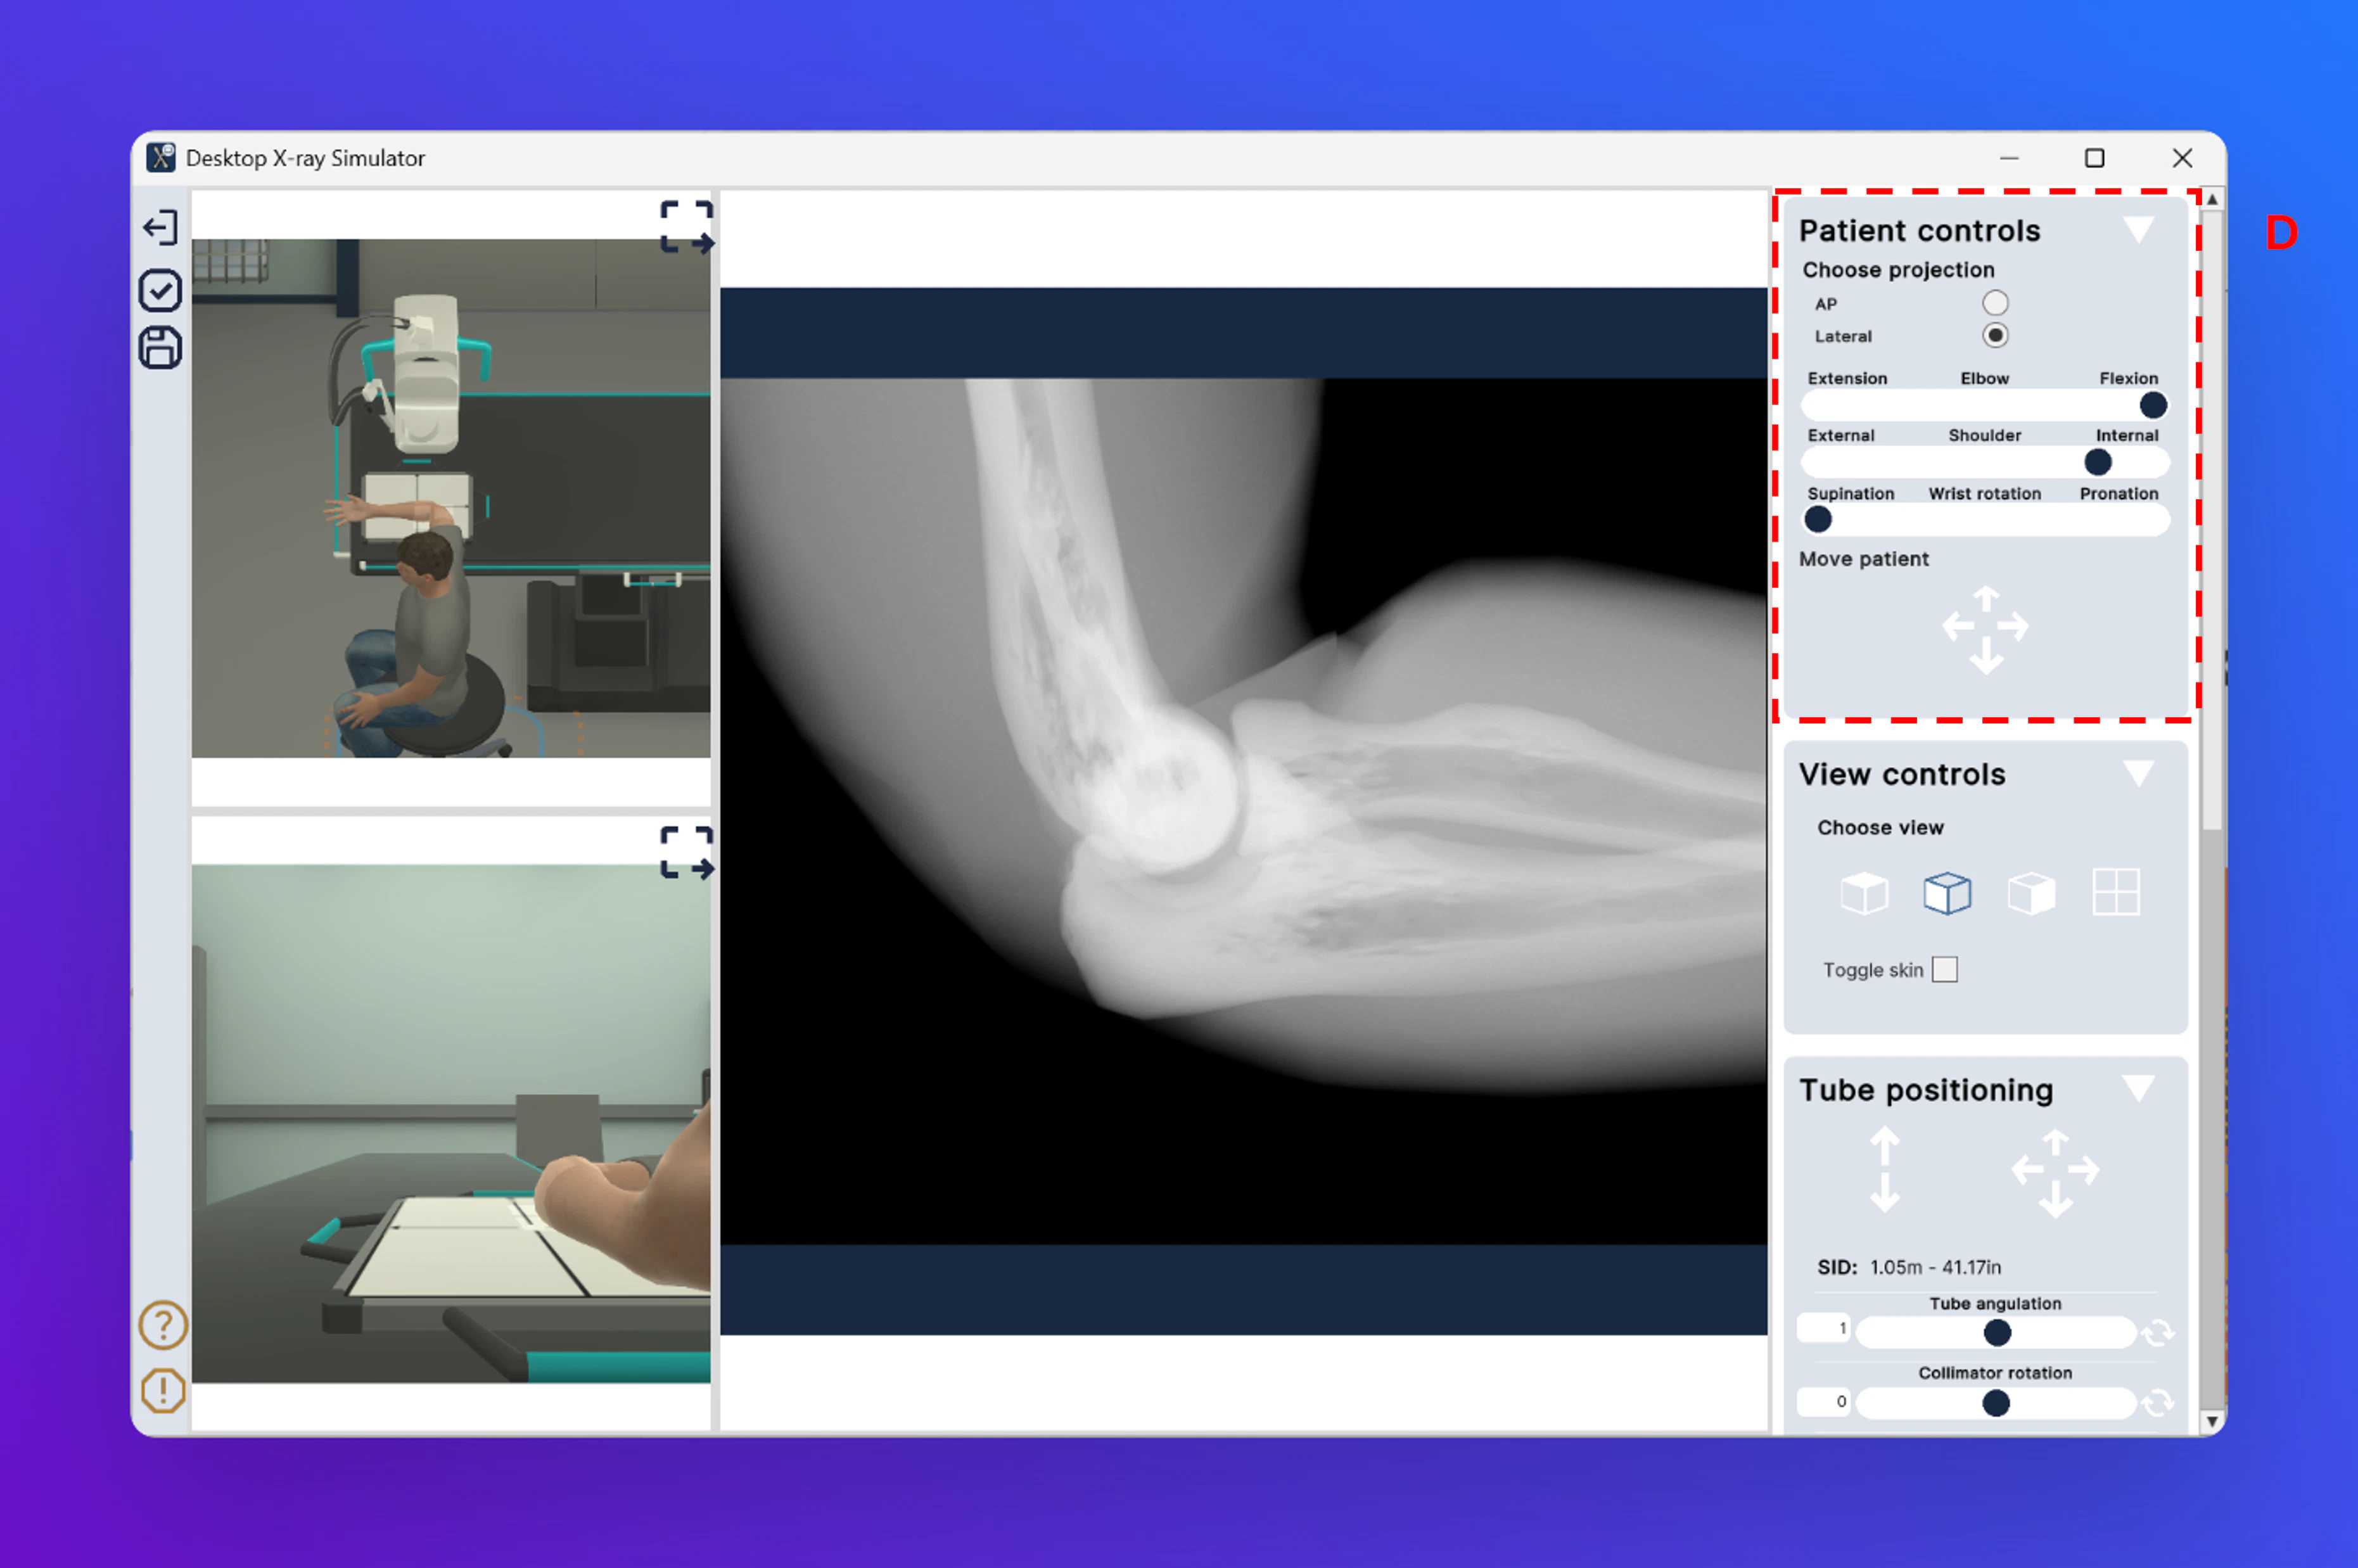
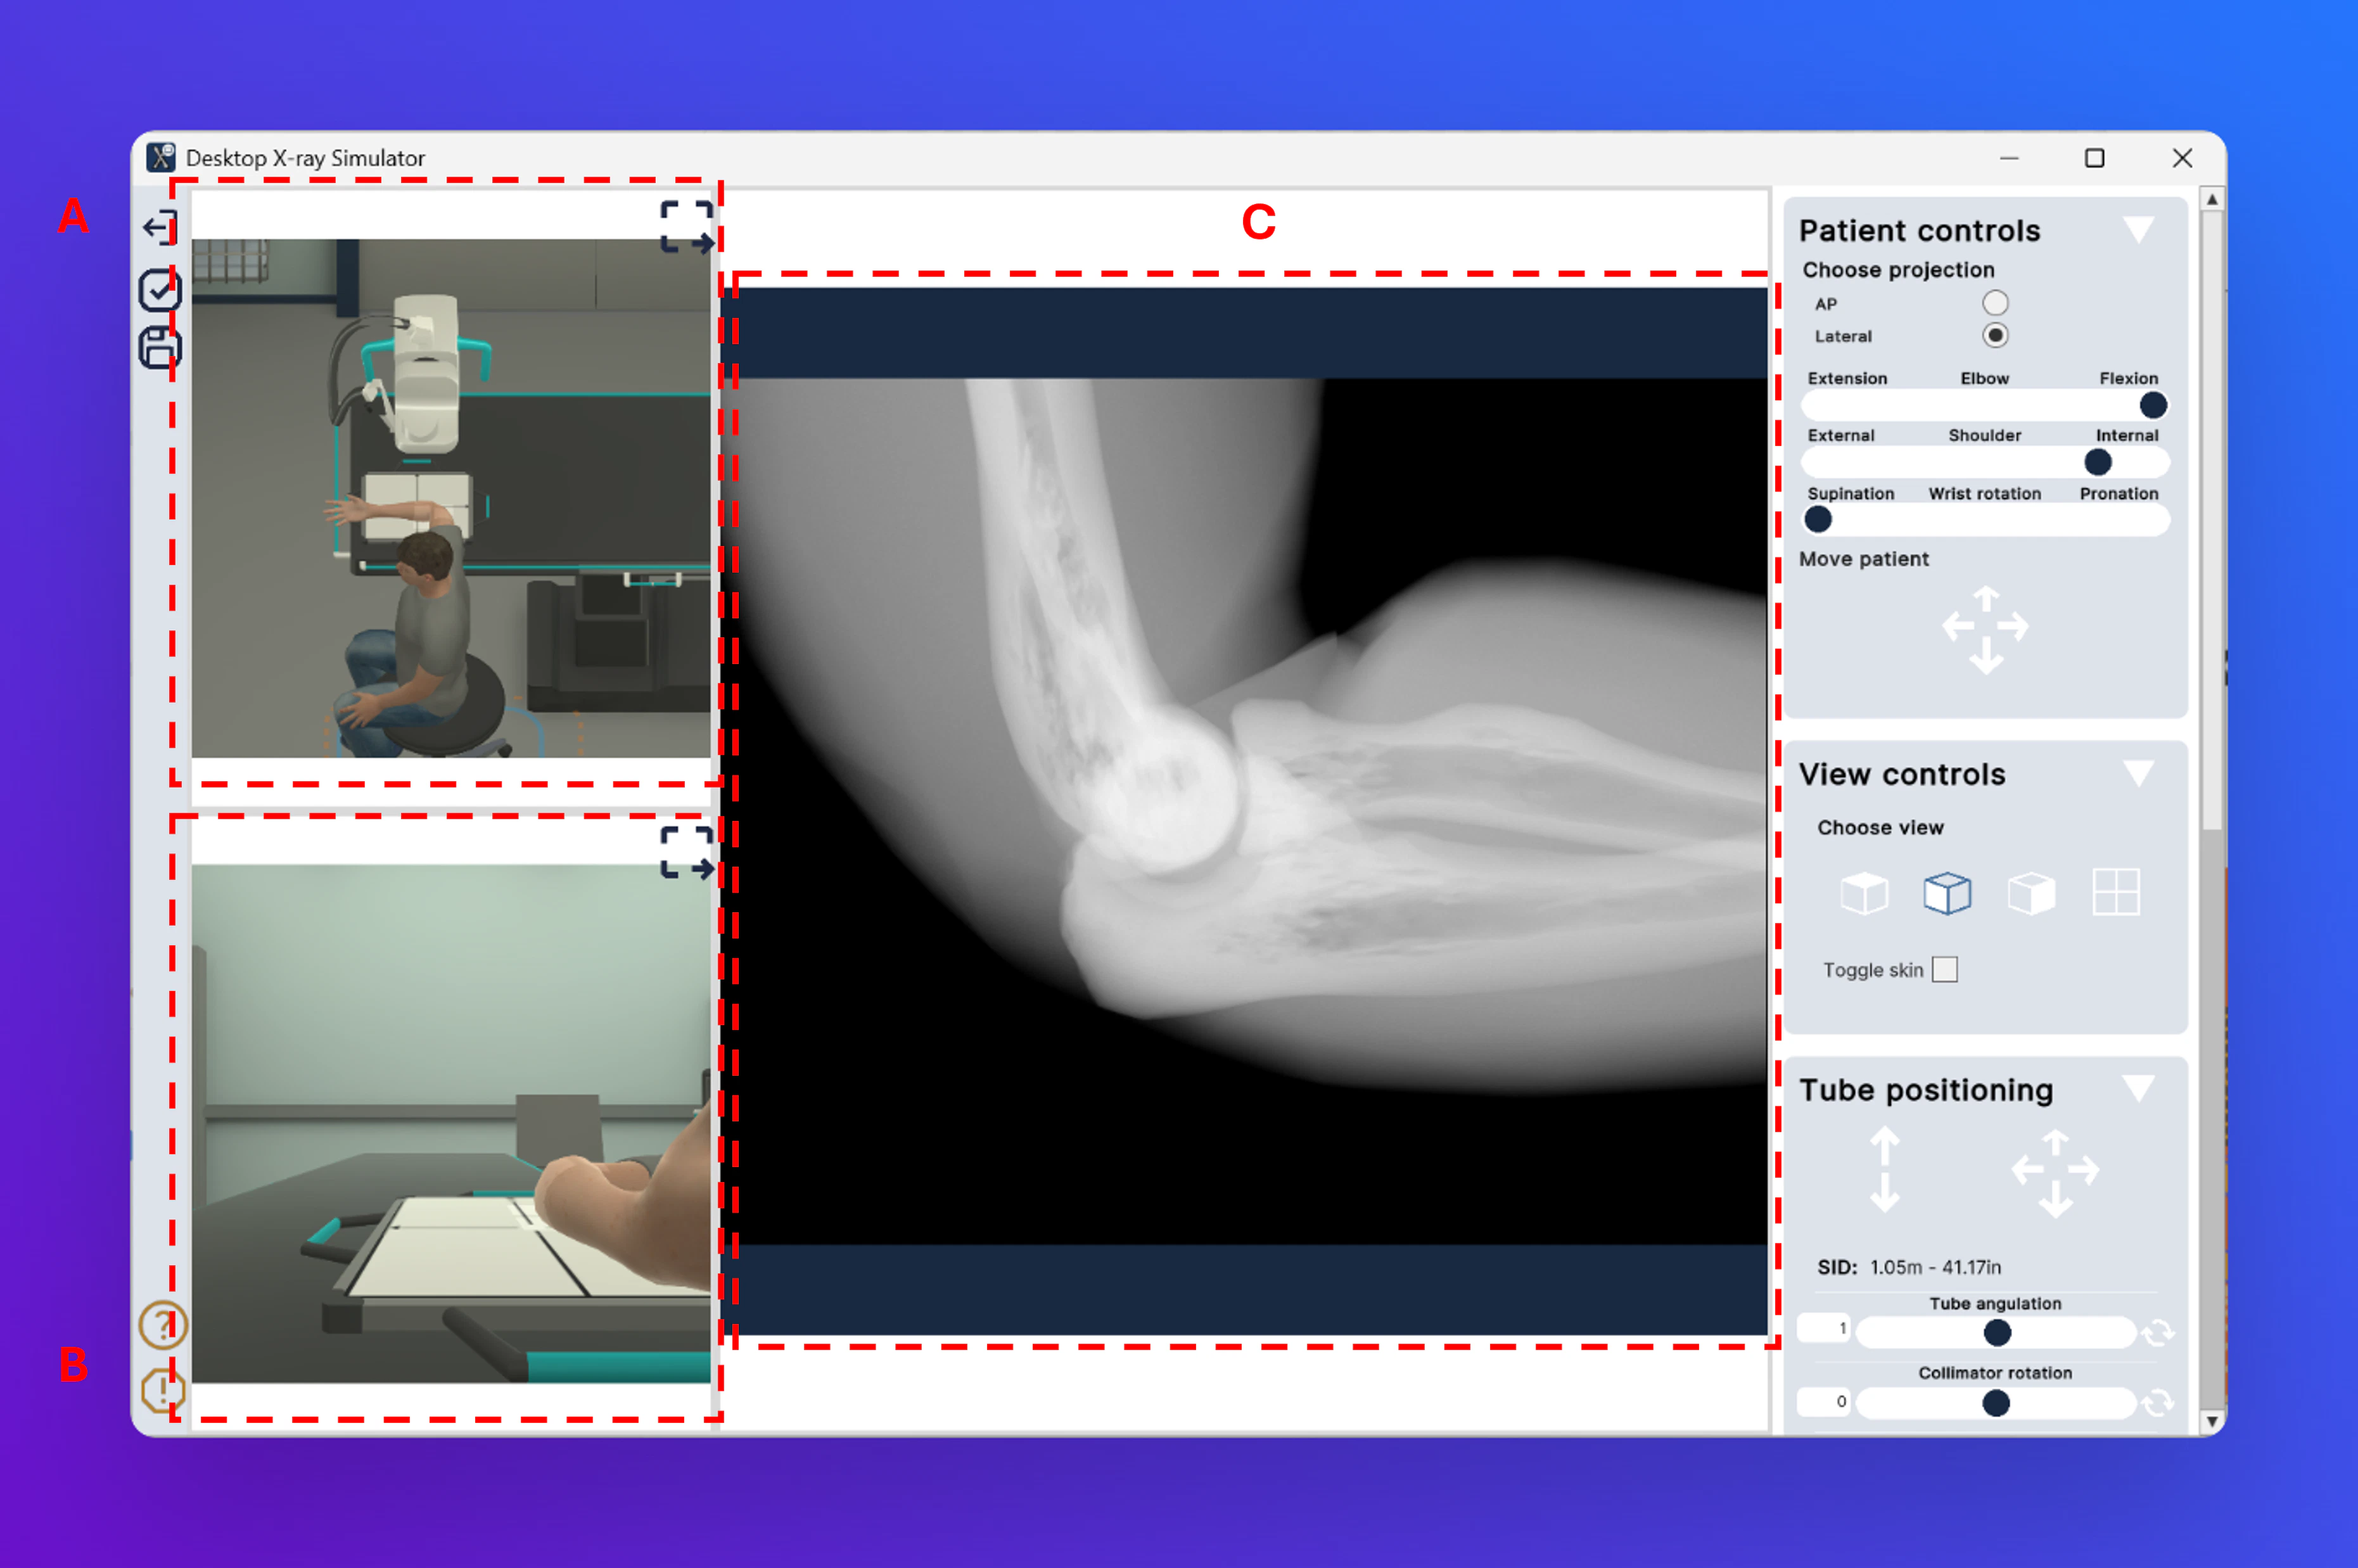 The **Patient controls** panel **(D)** is at the top of the right sidebar. Use *Choose projection* to switch between AP and Lateral. The sliders below let you adjust joint position - elbow flexion/extension, shoulder rotation, and wrist pronation/supination. Use *Move patient* to reposition the patient on the table.
 The **View controls** panel **(E)** sits below Patient controls. Use the four view icons under *Choose view* to switch the secondary viewport **(B)** between different camera angles. The *Toggle skin* checkbox switches the patient model between a surface view and a skeletal/transparent view, useful for assessing anatomy and tube alignment.
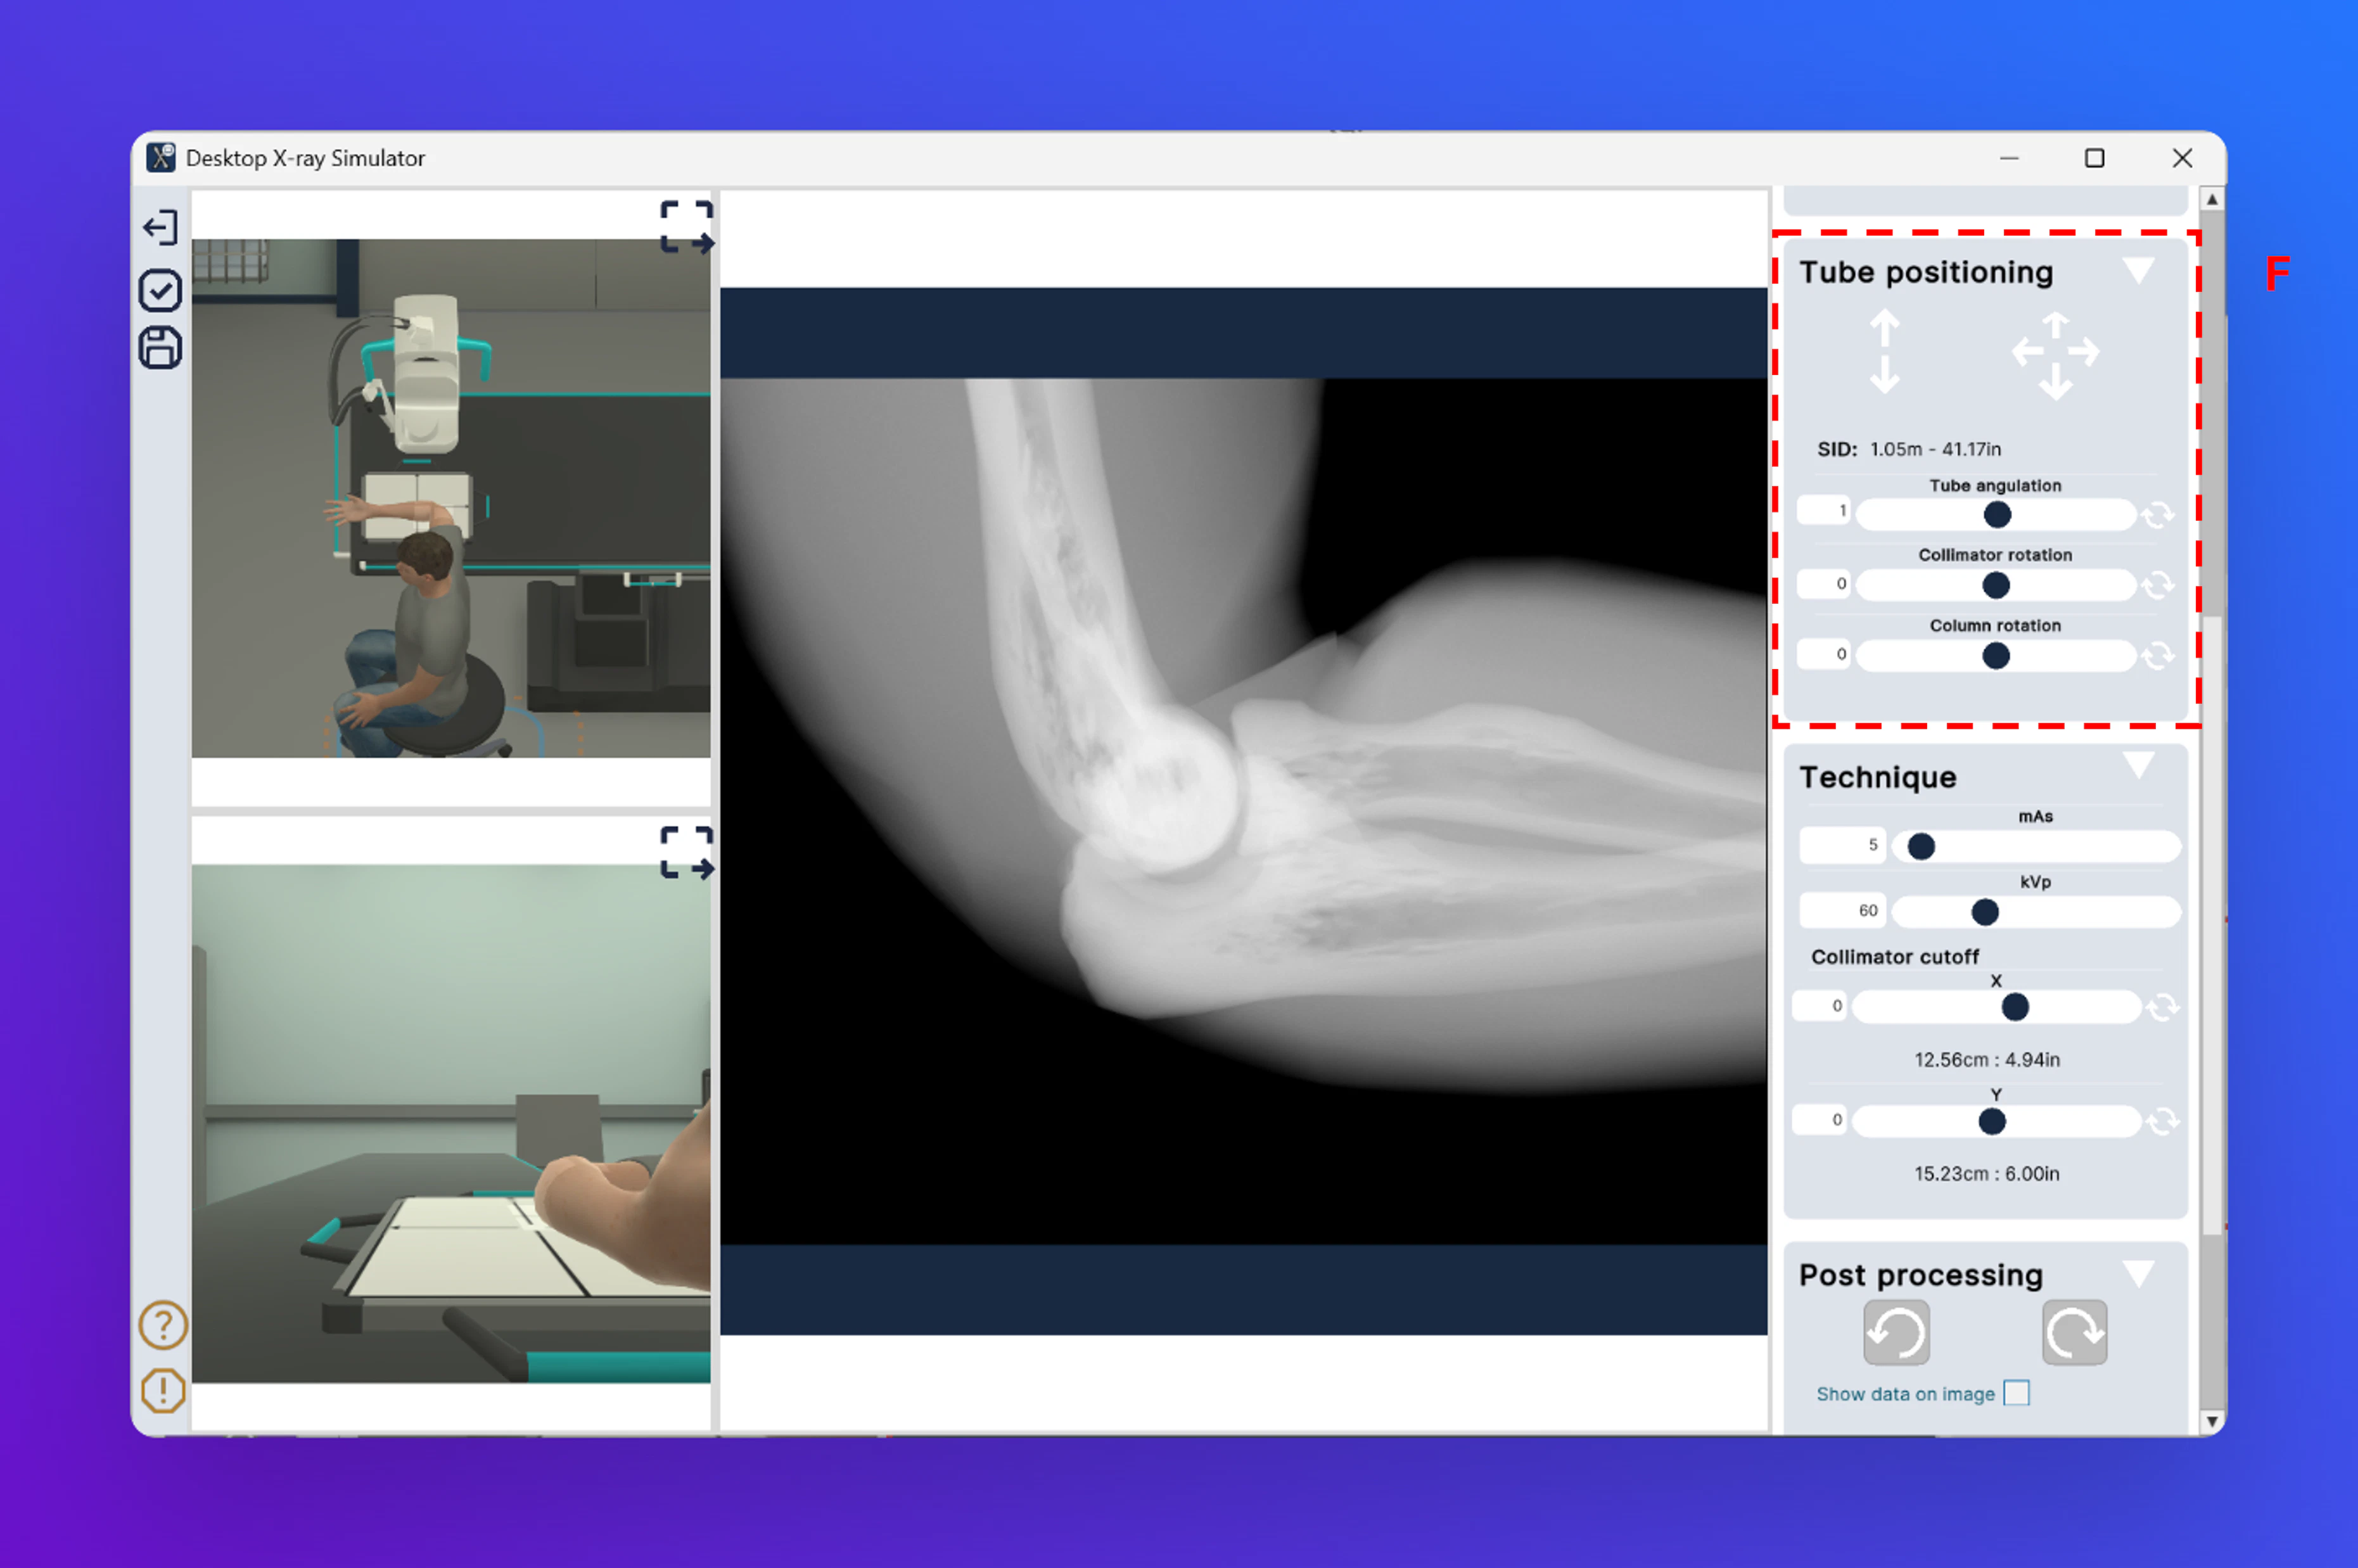
 The **Tube positioning** panel **(F)** controls the physical position of the X-ray tube. The arrow clusters adjust the tube horizontally and vertically. *SID* (Source-to-Image Distance) is displayed in real time as you move the tube. Use the *Tube angulation*, *Collimator rotation*, and *Column rotation* sliders to fine-tune the angle and orientation of the beam.
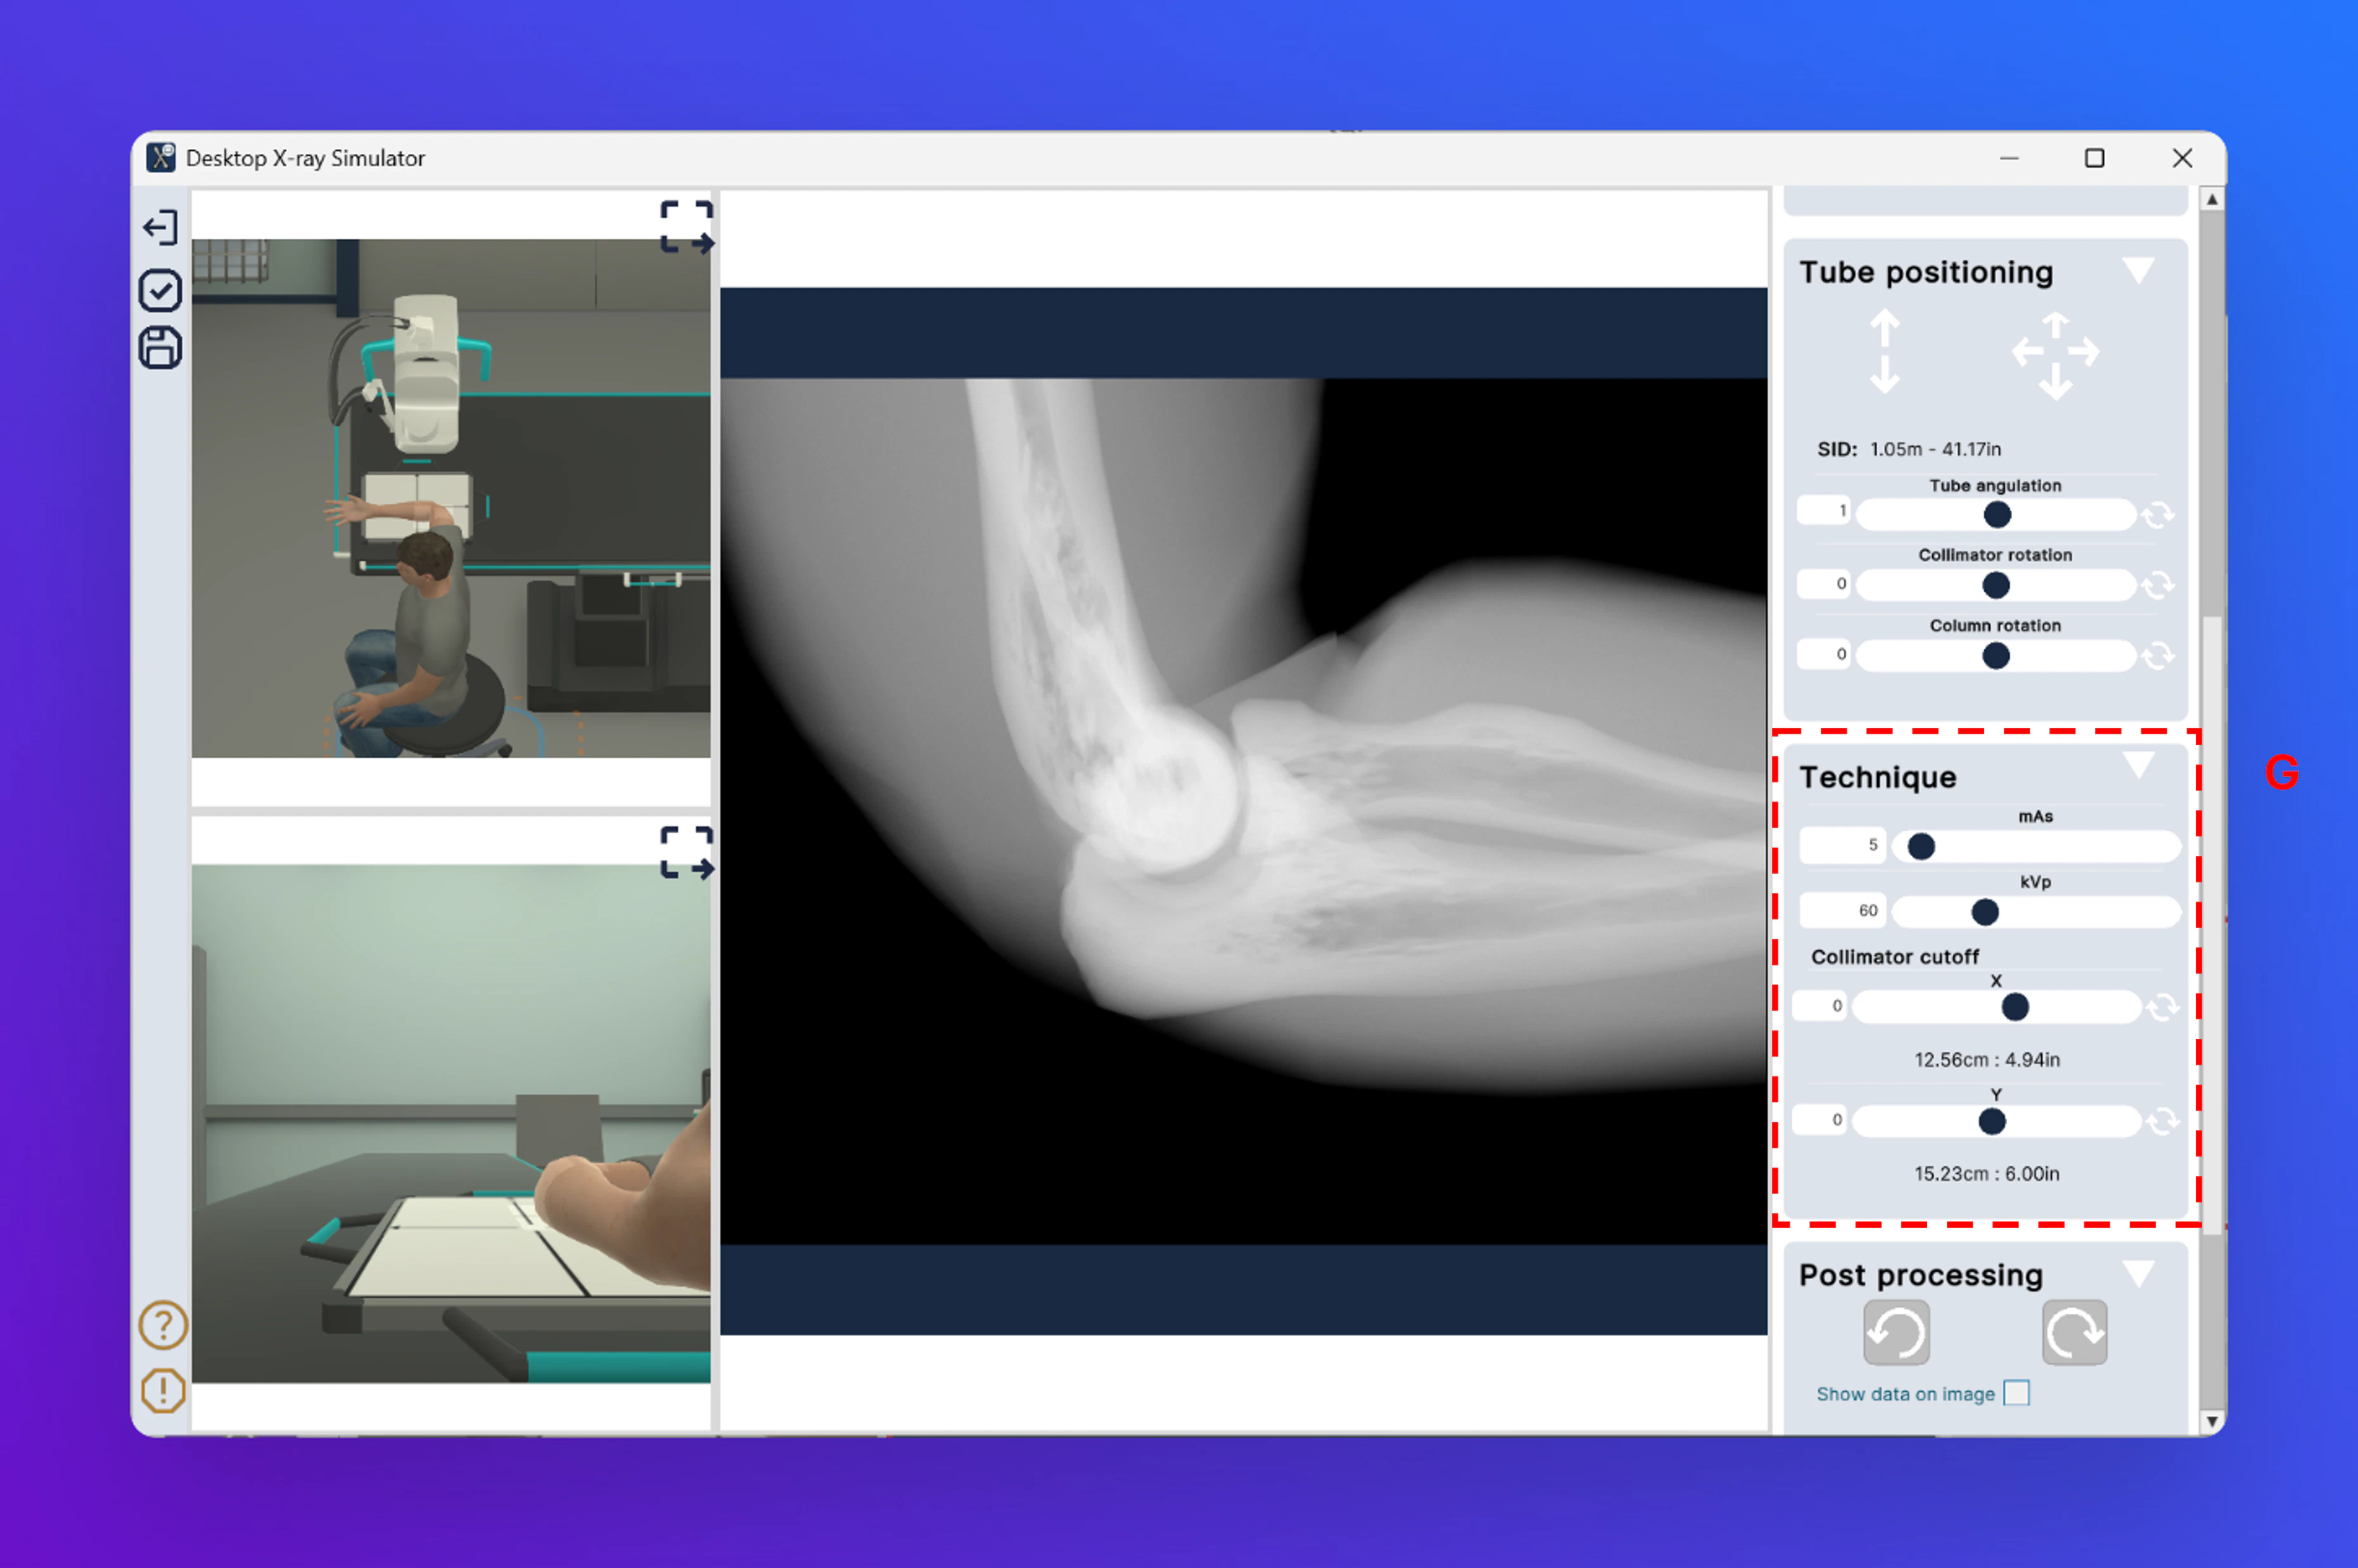
 The **Technique** panel **(G)** is where you set your exposure parameters. Adjust *mAs* to control the radiation dose and *kVp* to set the beam energy. The *Collimator cutoff* sliders control field size in the X and Y axes, with the resulting dimensions shown in centimetres and inches below each slider. Changes here are reflected immediately in the X-ray output panel **(C)**.
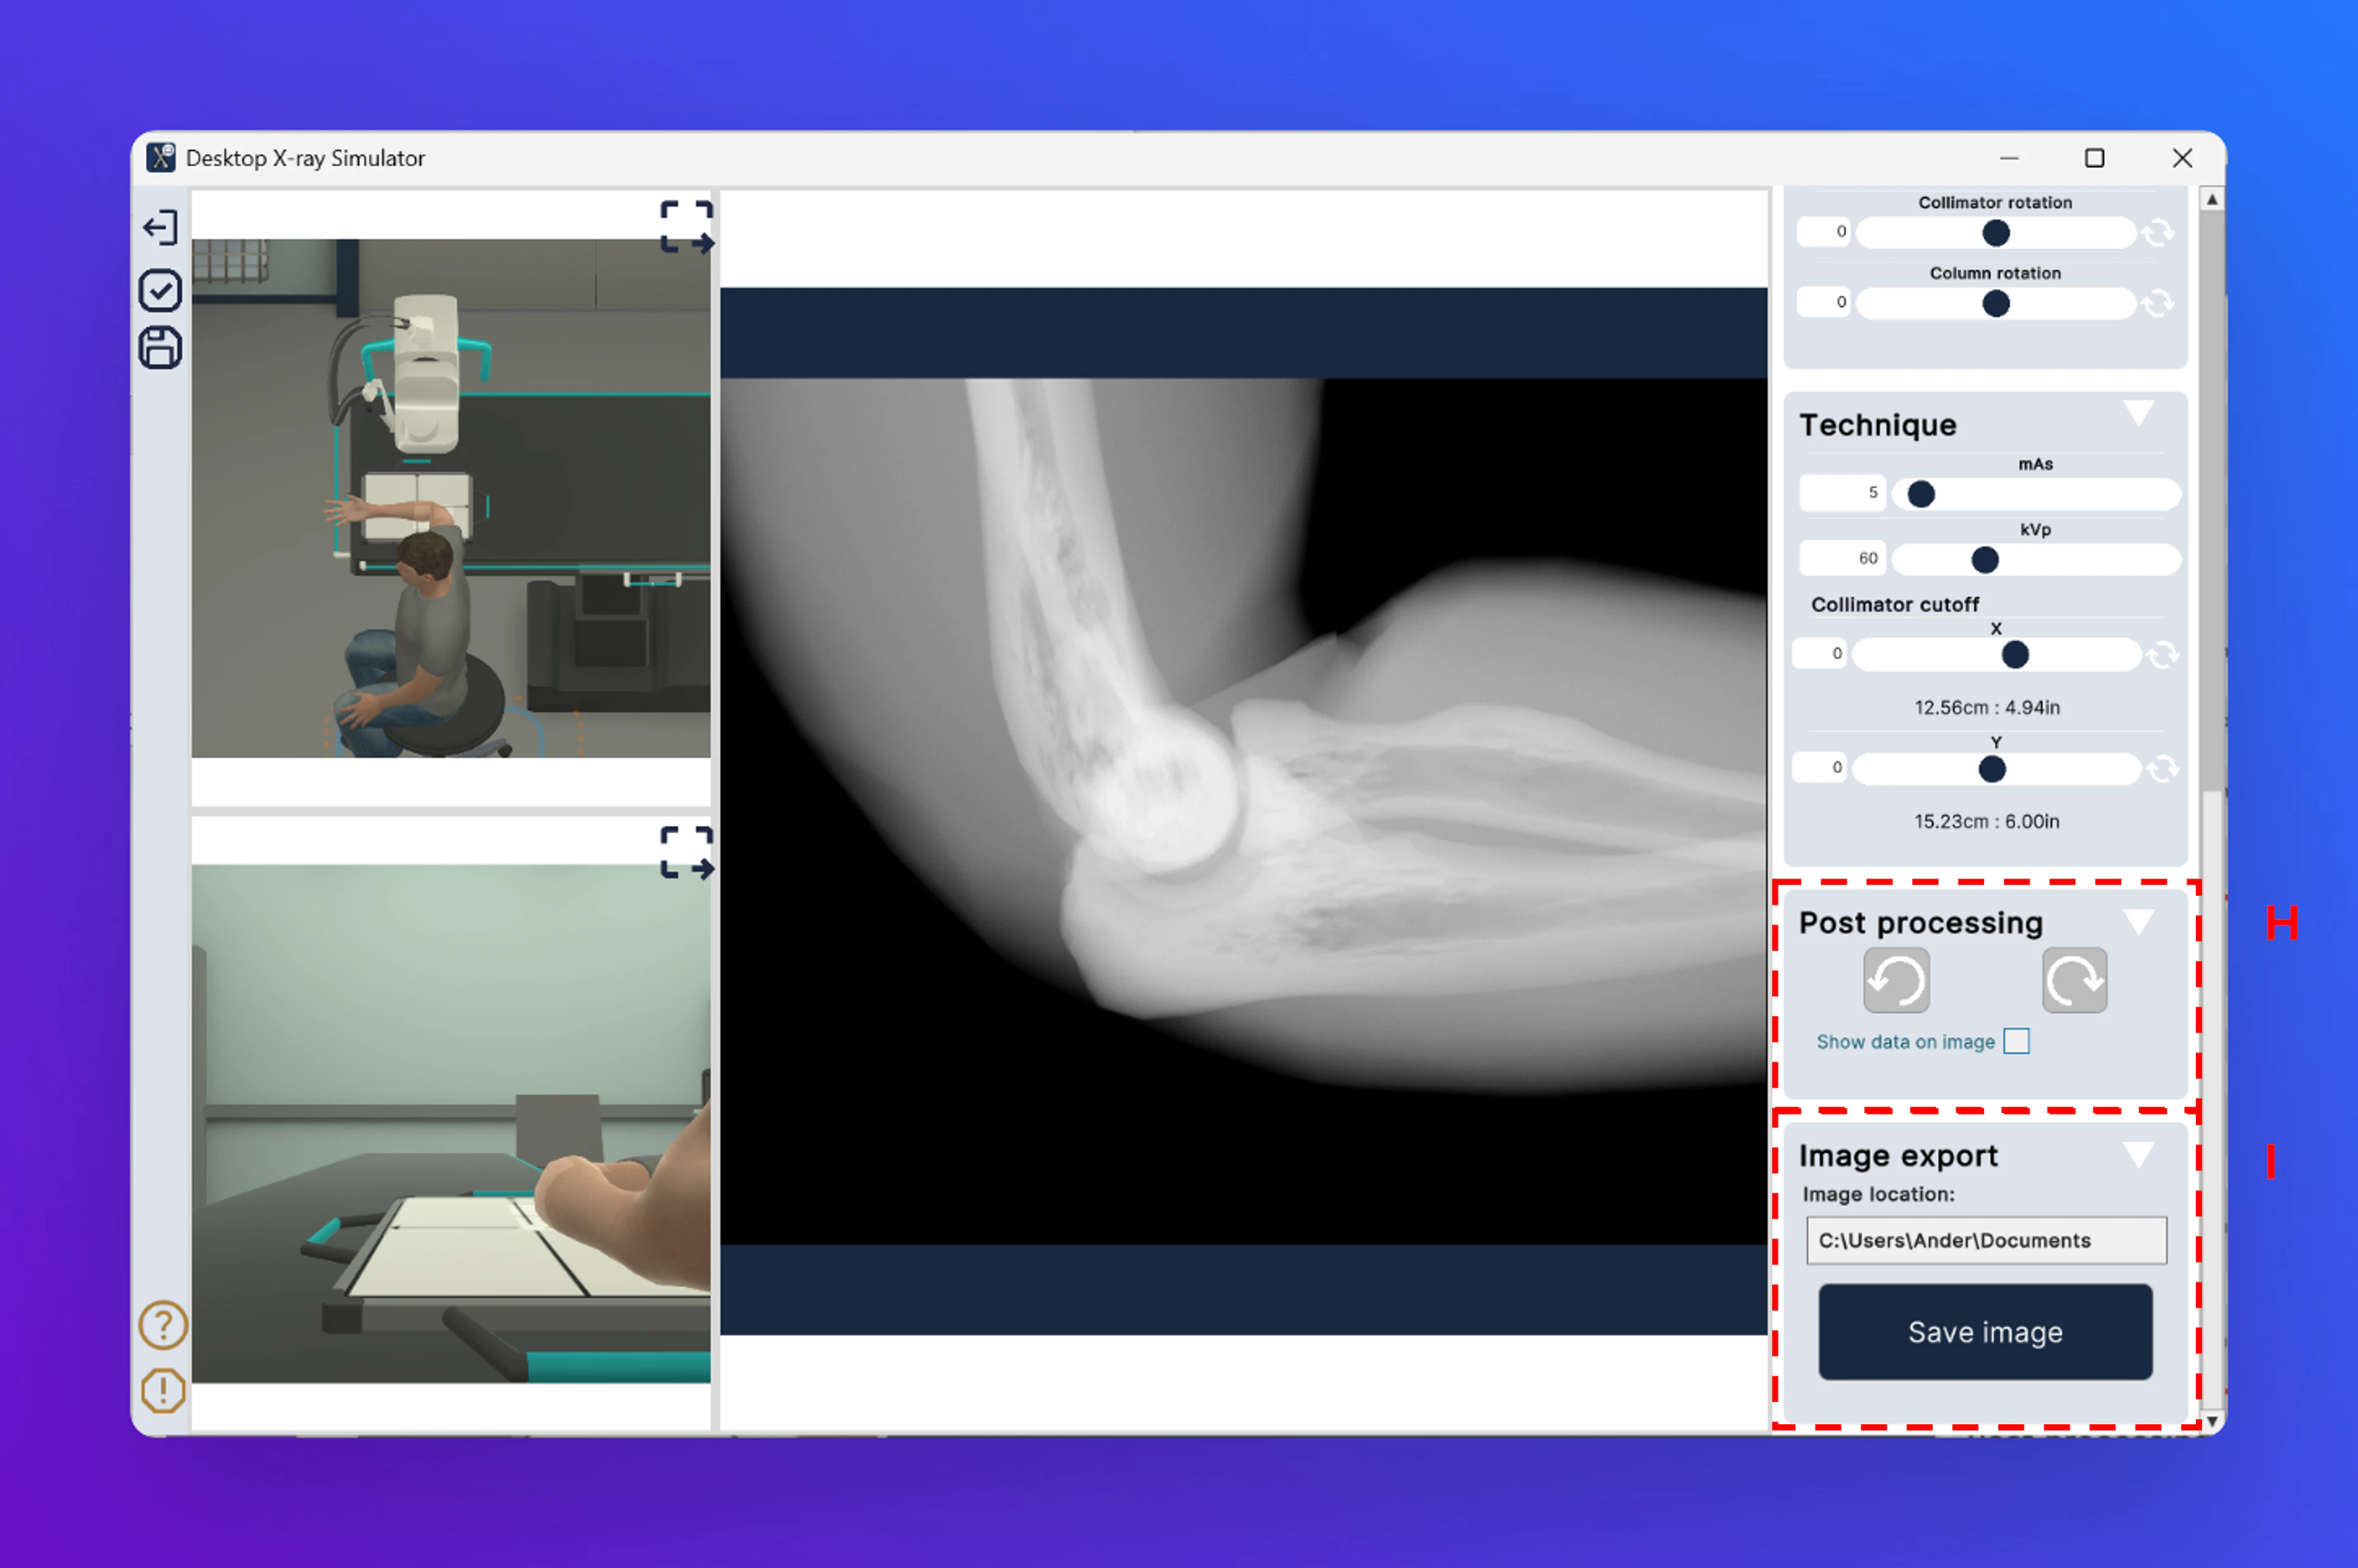
 The **Post processing** panel **(H)** provides two image processing buttons for adjusting the appearance of the exposure. Tick *Show data on image* to overlay exposure parameters directly on the X-ray. Below it, the **Image export** panel **(I)** shows the save location on your computer. Click **Save image** to export the current exposure as an image file to that folder.